
The first time I made katsu curry at home, I burned the curry roux and the chicken came out soggy instead of crispy. My kids took one look and asked if we could just order takeout.
That was three years ago. Now it’s one of our most-requested weeknight dinners.
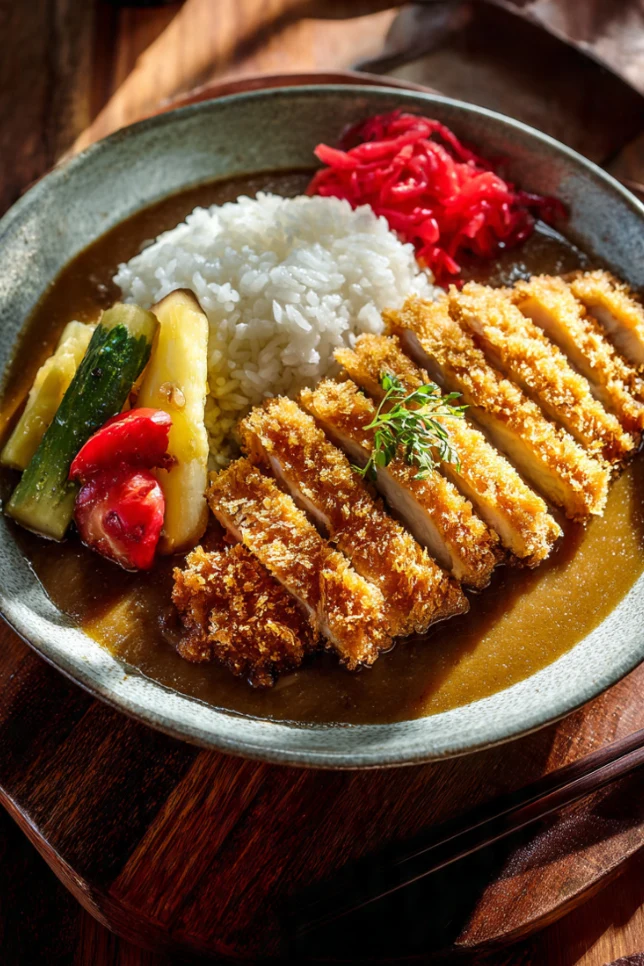
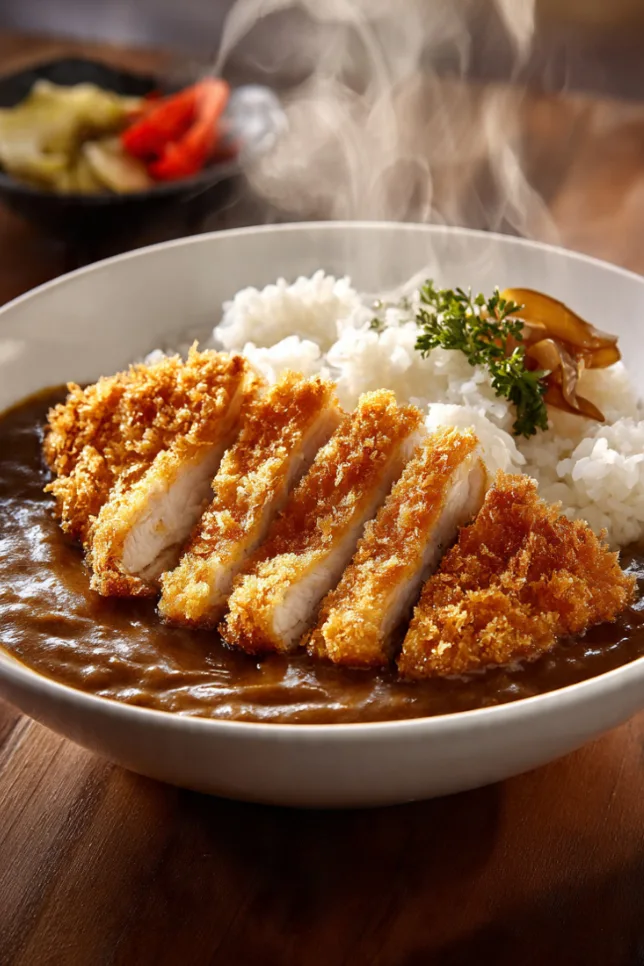
Japanese katsu curry is different from other curries you might know. It’s thick, slightly sweet, and rich in a way that coats every grain of rice. The crispy chicken cutlet sits on top like a golden crown, and when you cut into it, you get this perfect contrast of textures. Crunchy outside, juicy inside, sitting in that velvety curry sauce.
This is comfort food. The kind of dish you crave on cold evenings or when you need something that feels like a warm hug. It’s popular in Japan for good reason. You’ll find it everywhere from casual restaurants to train station food courts. People love it because it hits all the right notes.
What Makes It Special
Katsu curry combines two beloved Japanese dishes. Tonkatsu (breaded pork or chicken cutlet) meets Japanese curry. The curry itself is milder than Thai or Indian versions. It has a subtle sweetness and uses a roux-based sauce that reminds me a bit of gravy, but with warm spices like turmeric, cumin, and a hint of apple.
The chicken needs to be crispy. Really crispy. That’s non-negotiable. The curry should be thick enough to cling to your spoon but not gloopy. And the rice? Short-grain Japanese rice works best because it holds everything together.
I’ve tried shortcuts. Store-bought katsu from the deli section paired with instant curry. It works in a pinch, but making it from scratch gives you control over the flavors. You can adjust the spice level, make the curry exactly as thick as you want, and ensure that chicken stays perfectly crispy until it hits the table.
How to Use It
Serve katsu curry over steamed rice. That’s the classic way. The curry soaks into the rice, the crispy chicken adds texture, and every bite is satisfying.
Some people like to add pickled vegetables on the side. Fukujinzuke (sweet pickled vegetables) is traditional, but honestly, any tangy pickle works. It cuts through the richness.
You can also use this curry with other proteins. Pork cutlets are common. I’ve even made it with fried tofu for vegetarian friends. The curry is versatile.
Leftovers heat up well. The chicken loses some crispness, but you can revive it in a hot oven or air fryer. The curry actually tastes better the next day after the flavors meld together.
Storage Tips
Keep the fried chicken and curry separate if you’re storing leftovers. The chicken stays crispier that way. Store the curry in an airtight container in the fridge for up to 4 days. The chicken keeps for 2-3 days.
Freeze the curry for up to 3 months. I portion it into containers so I can thaw just what I need. The chicken doesn’t freeze well. It gets soggy.
When reheating, warm the curry gently on the stove with a splash of water or broth. It thickens as it sits, so you’ll need to loosen it up. For the chicken, use an oven at 375°F for about 10 minutes or an air fryer at 350°F for 5 minutes.
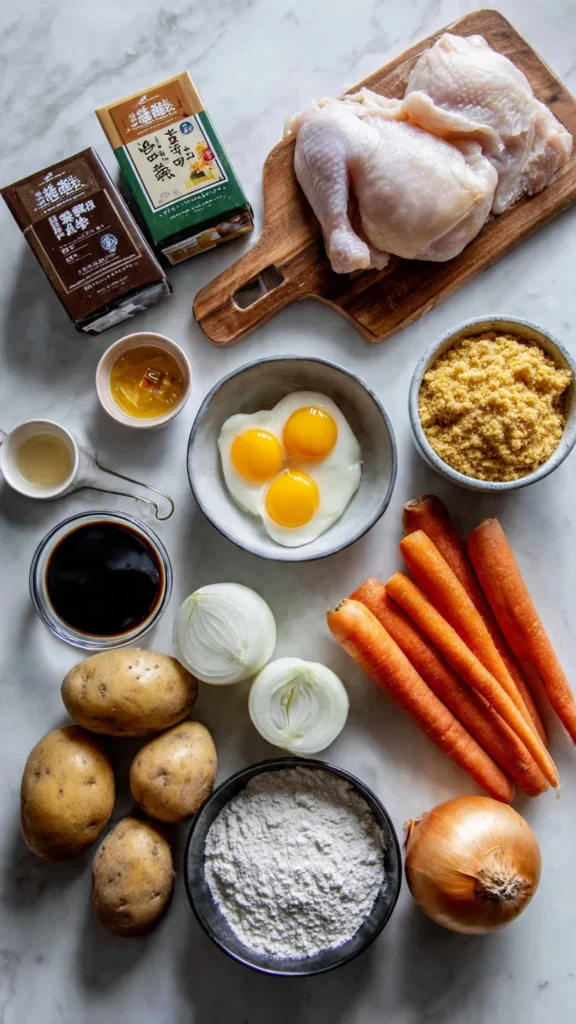
Ingredients
For the Curry:
- 2 tablespoons vegetable oil
- 1 onion, thinly sliced
- 2 carrots, peeled and chopped
- 2 medium potatoes, peeled and cubed
- 3 cups chicken broth
- 4 tablespoons Japanese curry roux (S&B Golden Curry is my go-to)
- 1 tablespoon soy sauce
- 1 teaspoon honey
For the Chicken Katsu:
- 2 boneless, skinless chicken breasts
- Salt and pepper
- 1/2 cup all-purpose flour
- 2 eggs, beaten
- 1 1/2 cups panko breadcrumbs
- Vegetable oil for frying
For Serving:
- 4 cups cooked Japanese short-grain rice
- Pickled vegetables (optional)
Instructions
- Start the curry. Heat oil in a large pot over medium heat. Add the onion and cook for 5 minutes until soft. Toss in the carrots and potatoes. Stir for another 3 minutes.
- Simmer the vegetables. Pour in the chicken broth. Bring to a boil, then reduce heat and simmer for 15 minutes until the vegetables are tender. You want them soft enough to pierce easily with a fork.
- Add the curry roux. Turn off the heat. Break the curry roux into pieces and stir into the pot. Keep stirring until it dissolves completely. Turn the heat back to low and simmer for 5 minutes. The sauce will thicken. Add soy sauce and honey. Taste it. Adjust if needed.
- Prep the chicken. While the curry simmers, pound the chicken breasts to an even thickness. About 1/2 inch thick works well. Season both sides with salt and pepper.
- Set up your breading station. Get three shallow bowls. Flour in the first. Beaten eggs in the second. Panko in the third. This assembly line makes coating easy.
- Bread the chicken. Dredge each piece in flour, shake off the excess. Dip in egg, let the extra drip off. Press into panko, making sure both sides are well coated. The panko should stick firmly.
- Fry the chicken. Heat about 1/2 inch of oil in a large skillet over medium-high heat. Test with a pinch of panko. If it sizzles immediately, the oil is ready. Add the chicken. Don’t crowd the pan. Fry for 4-5 minutes per side until golden brown and cooked through. The internal temperature should hit 165°F. Drain on paper towels.
- Slice and serve. Let the chicken rest for a minute, then slice into strips. Place rice in bowls. Ladle curry over the rice. Top with sliced chicken katsu. Add pickled vegetables if you like.
Kitchen Notes
The curry roux is key. I use S&B Golden Curry (medium hot), but you can find other brands at Asian markets. Each brand has different spice levels. Start mild if you’re unsure.
Panko breadcrumbs make a huge difference. They’re lighter and crispier than regular breadcrumbs. Don’t substitute if you can help it.
Oil temperature matters. Too hot and the chicken burns before cooking through. Too cool and it gets greasy. Medium-high heat usually works, but use a thermometer if you have one. Around 350°F is ideal.
If you’re nervous about frying, you can bake the chicken at 400°F for 20-25 minutes. It won’t be quite as crispy, but it’s still good.
Some people add apple or even chocolate to their curry for extra depth. I keep it simple, but feel free to experiment.
This article is part of our comprehensive guide on Asian Cuisine. For more authentic Asian recipes, explore our full collection.
Related Recipes:
- Japanese Ramen Bowl – Rich broth ramen with savory toppings
- Japanese Teriyaki Salmon – Sweet and savory glazed salmon
- Korean Kimchi Fried Rice – Spicy fried rice with tangy kimchi
- Chinese Sweet and Sour Chicken – Crispy chicken in tangy sauce
Japanese Katsu Curry
Crispy chicken cutlet with thick Japanese curry sauce
Ingredients
For the Curry:
- 2 tablespoons vegetable oil
- 1 onion, thinly sliced
- 2 carrots, peeled and chopped
- 2 medium potatoes, peeled and cubed
- 3 cups chicken broth
- 4 tablespoons Japanese curry roux (S&B Golden Curry recommended)
- 1 tablespoon soy sauce
- 1 teaspoon honey
For the Chicken Katsu:
- 2 boneless, skinless chicken breasts
- Salt and pepper
- 1/2 cup all-purpose flour
- 2 eggs, beaten
- 1 1/2 cups panko breadcrumbs
- Vegetable oil for frying
For Serving:
- 4 cups cooked Japanese short-grain rice
- Pickled vegetables (optional)
Instructions
- Start the curry. Heat oil in a large pot over medium heat. Add the onion and cook for 5 minutes until soft. Toss in the carrots and potatoes. Stir for another 3 minutes.
- Simmer the vegetables. Pour in the chicken broth. Bring to a boil, then reduce heat and simmer for 15 minutes until the vegetables are tender. You want them soft enough to pierce easily with a fork.
- Add the curry roux. Turn off the heat. Break the curry roux into pieces and stir into the pot. Keep stirring until it dissolves completely. Turn the heat back to low and simmer for 5 minutes. The sauce will thicken. Add soy sauce and honey. Taste and adjust if needed.
- Prep the chicken. While the curry simmers, pound the chicken breasts to an even thickness of about 1/2 inch. Season both sides with salt and pepper.
- Set up your breading station. Get three shallow bowls. Flour in the first. Beaten eggs in the second. Panko in the third. This assembly line makes coating easy.
- Bread the chicken. Dredge each piece in flour, shake off the excess. Dip in egg, let the extra drip off. Press into panko, making sure both sides are well coated. The panko should stick firmly.
- Fry the chicken. Heat about 1/2 inch of oil in a large skillet over medium-high heat. Test with a pinch of panko. If it sizzles immediately, the oil is ready. Add the chicken. Don’t crowd the pan. Fry for 4-5 minutes per side until golden brown and cooked through. The internal temperature should hit 165°F. Drain on paper towels.
- Slice and serve. Let the chicken rest for a minute, then slice into strips. Place rice in bowls. Ladle curry over the rice. Top with sliced chicken katsu. Add pickled vegetables if you like.
Nutrition Per Serving
Kitchen Notes
Curry Roux: The curry roux makes or breaks this dish. S&B Golden Curry (medium hot) is recommended, but Thai Kitchen works too. Start with 2-3 tablespoons if worried about intensity. You can always add more.
Panko Breadcrumbs: Japanese panko is lighter and crispier than regular breadcrumbs. Don’t substitute if you can help it. The texture difference is significant.
Oil Temperature: Medium-high heat usually works, but use a thermometer if you have one. Around 350°F is ideal. Too hot and the chicken burns. Too cool and it gets greasy.
Baking Option: If you’re nervous about frying, bake the breaded chicken at 400°F for 20-25 minutes. It won’t be quite as crispy, but it’s still good.
Storage: Keep fried chicken and curry separate when storing. Store curry in an airtight container in the fridge for up to 4 days. Chicken keeps for 2-3 days. Freeze curry for up to 3 months (add a splash of water when reheating). Reheat chicken in a 375°F oven for 10 minutes or air fryer at 350°F for 5 minutes to restore crispness.